Pest Inspection: What Professionals Check and What Homeowners Should Expect

Published: October 9, 2026
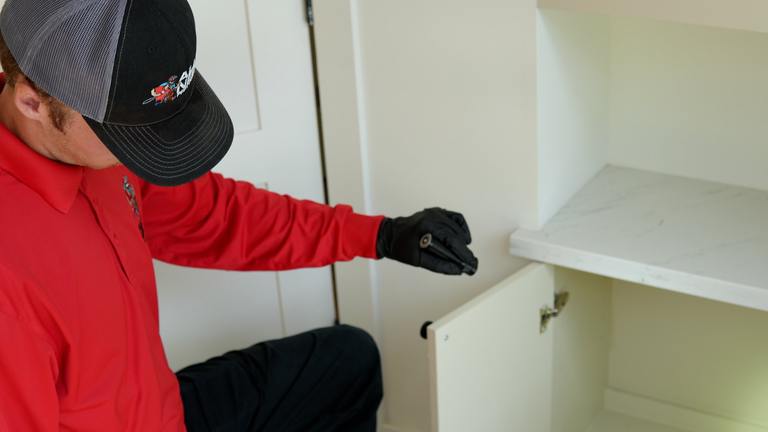
Introduction
Pests rarely make a formal entrance. They slip through a worn door sweep, follow a plumbing line into a wall, settle beneath damp mulch, or find shelter in an attic long before anyone sees them. By the time ants cross a counter or scratching starts overhead, the visible activity may be only one part of the problem.
A professional pest inspection is designed to connect those scattered clues. It looks for the pest itself, but it also looks for entry points, food, water, shelter, damage, and conditions that could allow activity to continue. The goal is not simply to produce a list of bugs. It is to understand what is happening, where it started, how serious it may be, and which response fits the evidence.
For homeowners, knowing what to expect makes the visit more useful. A little preparation, a clear record of what you have noticed, and a few well-chosen questions can help turn an uncertain sighting into a practical plan.

What Is a Pest Inspection?
A pest inspection is a systematic evaluation of a home and the area immediately around it for current pest activity, past evidence, possible access routes, and conditions that support pests. Depending on the concern, the technician may examine the exterior, living spaces, kitchen, bathrooms, garage, attic, crawl space, utility areas, landscape edges, or other accessible locations.
Inspection is the foundation of responsible pest management. The principles of integrated pest management emphasize monitoring and accurate identification before control decisions are made. That matters because similar signs can point to very different problems. Fine debris near wood might come from a wood-destroying insect, an ant nest, or ordinary construction material. Tiny insects near a sink might be drain flies, fruit flies, fungus gnats, or another small fly with a different breeding source.
A useful inspection should answer four basic questions:
- What pest, or likely pest, is involved?
- Where is the activity concentrated?
- What conditions are helping it survive or enter?
- What combination of correction, monitoring, exclusion, or treatment is appropriate?
That last point is important. An inspection is not automatically a treatment, and a treatment recommendation should not be automatic either. Sometimes the most useful first step is fixing a leak, replacing weatherstripping, moving firewood, cleaning a hidden food spill, or setting monitors to confirm the source.
What Does a Professional Pest Inspection Cover?
The exact route depends on the home, the region, and the concern reported by the homeowner. Still, most thorough inspections move from broad conditions to specific evidence. Technicians compare what they see outside with what is happening inside, then look for a path connecting the two.
The exterior perimeter
The outside of the home often explains indoor activity. A technician may walk the foundation and inspect:
- Gaps beneath doors and around windows
- Openings where pipes, cables, vents, or air-conditioning lines enter
- Cracks in masonry, siding, soffits, fascia, or trim
- Damaged screens, loose vent covers, and worn seals
- Mulch, leaves, vines, or dense vegetation touching the structure
- Firewood, lumber, cardboard, or stored items beside exterior walls
- Standing water, clogged gutters, irrigation overspray, and poor drainage
- Nests, burrows, webs, mud tubes, trails, or insect activity
- Roofline or tree access that may help rodents reach an attic
These observations help separate a one-time visitor from a repeating access problem. For example, a single palmetto bug carried in with a box is different from recurring cockroach activity beside a damp plumbing penetration. When those insects keep returning, a focused cockroach control assessment can identify the species and the conditions supporting it.

Kitchens, bathrooms, and utility spaces
Food, water, warmth, and protected gaps make kitchens and bathrooms high-value inspection areas. The technician may look beneath sinks, around appliances, along cabinet seams, behind toilets, near drains, beside water heaters, and around laundry equipment.
Evidence can include droppings, shed skins, egg cases, damaged packaging, live or dead insects, grease marks, webbing in dry goods, or activity on monitors. Leaks and condensation also matter. Moisture does not create pests, but it can make a hidden space much more suitable for cockroaches, ants, silverfish, flies, and other organisms.
Attics, crawl spaces, garages, and storage areas
These spaces may offer quiet shelter and go undisturbed for long periods. When they are safely accessible, an inspector may check insulation, beams, sill plates, roof penetrations, vents, stored boxes, and the edges where utilities enter.
Rodent evidence deserves careful handling. Droppings, gnaw marks, nesting material, rub marks, tracks, odors, and disturbed insulation can help locate travel routes. The CDC recommends regularly checking indoor and outdoor areas for rodent droppings and gnaw marks, while also following appropriate precautions for contaminated material. Do not sweep or vacuum suspect droppings before asking how they should be handled.
A professional rodent control inspection can pair the evidence with likely access points and a plan for removal, exclusion, and follow-up.
Bedrooms and upholstered furniture
If bites, spotting, or travel-related concerns prompted the visit, the inspection may focus on mattress seams, box springs, bed frames, headboards, nearby furniture, baseboards, and other tight hiding places. Skin marks alone cannot confirm a bed bug problem. The inspector looks for physical evidence such as live insects, shed skins, eggs, or characteristic spotting.
Avoid moving furniture or bedding to another room before the visit. Moving items can scatter evidence and potentially spread activity. A dedicated bed bug control evaluation is more specific than a routine whole-home check and may come with its own preparation instructions.
Wood, foundations, and moisture-prone areas
Wood-destroying insects require a more specialized inspection. Accessible framing, baseboards, windows, doors, crawl-space components, slab edges, attached structures, and wood close to soil may receive extra attention. Inspectors may look for shelter tubes, discarded wings, pellets, damaged wood, blistering surfaces, or moisture conditions.
The University of Florida recommends minimizing moisture, reducing wood and cellulose food sources, and keeping the structure easy to inspect. It also explains the value of maintaining visible inspection space near the bottom of exterior wall coverings.
If the concern involves termites or another wood-destroying organism, ask whether you need a formal report, a real estate inspection, or a separate termite control inspection. A general pest visit and an official wood-destroying organism report are not always the same service.
The lawn and immediate landscape
Outdoor inspection is not limited to the foundation. The technician may check shaded ground cover, tree and shrub contact, lawn damage, standing water, containers, gutters, drains, and areas where people or pets spend time.
This is especially useful when the complaint involves mosquitoes, fleas, ticks, fire ants, wasps, or turf pests. With mosquitoes, for example, the adult insects resting in vegetation are only part of the picture. The inspection should also look for water-filled containers, clogged drainage areas, plant saucers, toys, tarps, and other breeding sites.
A targeted mosquito control evaluation can then focus on the parts of the property that are actually producing or harboring activity.
What Clues Are Inspectors Looking For?
Homeowners often expect an inspector to find live pests. Sometimes that happens, but indirect evidence can be more informative. A trained technician reads the property much like a timeline, comparing fresh evidence with old or unrelated material.
Common clues include:
- Live or dead insects and correctly identified specimens
- Droppings, frass, pellets, egg cases, shed skins, or wings
- Gnawing, rub marks, tracks, nesting material, or burrows
- Damaged food packages, fabrics, plants, insulation, or wood
- Ant trails, spider webs, mud tubes, galleries, or exit holes
- Musty or unusual odors associated with concentrated activity
- Entry gaps and travel routes between shelter and resources
- Leaks, condensation, damp wood, standing water, or high humidity
- Food residue, pet food, unsecured trash, clutter, and cardboard
- Previous treatment marks, traps, bait placements, or repaired openings
One clue rarely tells the whole story. Old termite damage does not by itself prove current activity. A few rodent droppings may show prior access but not reveal whether the opening remains active. A dead cockroach near a garage door may be an isolated exterior invader. Good inspection work weighs the location, amount, age, pattern, species, and surrounding conditions before drawing a conclusion.
How Should You Prepare for a Pest Inspection?
Most homes do not need a top-to-bottom cleaning before the appointment. In fact, removing every sign can make the source harder to locate. The best preparation improves access and preserves useful evidence.
1. Record what you noticed
Write down where and when the activity occurred. Note whether it followed rain, irrigation, travel, a delivery, construction, landscaping, or a change in weather. Photos and short videos are valuable when the pest disappears before the appointment. If you can safely capture a specimen, place it in a sealed container without crushing it.
2. Leave evidence in place when practical
Do not wipe away a trail, discard a damaged package, plug an active hole, or apply several sprays immediately before the visit unless safety requires action. Mark the spot or photograph it. Evidence can help the technician identify a source and avoid unnecessary treatment.
3. Provide safe access
Clear a reasonable path to sinks, attic hatches, crawl-space doors, garages, water heaters, utility closets, and the rooms where activity occurred. You do not need to empty the entire home. Move only enough stored material to allow a careful look at edges, walls, and access panels.
4. Secure pets and share household concerns
Keep pets safely away from doors, inspection equipment, and work areas. Tell the technician about aquariums, birds, reptiles, young children, pregnancy, allergies, asthma, or other sensitivities before any treatment is discussed. Inspection findings should guide a plan that fits both the pest and the household.
5. Gather relevant records
Previous service reports, termite warranties, repair invoices, plumbing history, remodeling details, and recent real estate documents can provide context. Mention any products, traps, baits, or home remedies already used and where they were placed.
For a broad household concern, reviewing the company’s home and general pest control process before the appointment can also clarify which common pests are included and which specialized inspections may need separate scheduling.

What Should Happen After the Inspection?
A professional should explain the findings in plain language. You should understand what was observed, what remains uncertain, where the activity is concentrated, and which conditions matter most. Photos, diagrams, monitor locations, or a written service report can make the recommendations easier to follow.
A sensible plan may include several parts:
- Identification: Confirm the pest as closely as the available evidence allows.
- Immediate priorities: Address health, safety, contamination, stinging risk, or active damage first.
- Source correction: Repair leaks, improve drainage, remove food or shelter, or adjust storage.
- Exclusion: Seal appropriate openings after confirming that pests will not be trapped inside.
- Targeted control: Use baits, traps, dusts, liquids, mechanical removal, or another method suited to the pest and location.
- Monitoring: Recheck vulnerable areas to learn whether activity is falling, moving, or returning.
- Follow-up: Adjust the plan based on evidence rather than repeating the same action automatically.
Ask the technician to separate confirmed findings from risk conditions. A foundation gap is a possible entry point, not proof that a particular insect used it. Damp mulch may increase pest pressure, but it is not itself an infestation. Clear wording helps homeowners prioritize repairs without assuming every vulnerability requires immediate pesticide use.
Does a Clear Inspection Mean the Home Has No Pests?
No inspection can guarantee that every concealed pest is absent. Wall voids, inaccessible roof areas, closed structural cavities, belongings, and underground nests limit what can be seen during a visual visit. Pest activity also changes with weather, season, and time of day.
A clear result means no relevant evidence was found in the areas inspected under the conditions present at that time. That is still useful information. It can establish a baseline, narrow the likely cause of a complaint, or support monitoring instead of immediate treatment.
Homeowners should also understand the scope. A general household inspection may not satisfy a lender, real estate contract, termite warranty, or state form requirement. Likewise, an insect inspection does not replace evaluation by a roofer, plumber, electrician, mold professional, wildlife specialist, or structural engineer when the evidence points beyond pest management.
When Is an Inspection Worth Scheduling?
An inspection is appropriate whenever the source or scale of a problem is unclear. It is especially useful when:
- The same pest returns after cleaning or store-bought treatment
- Activity appears in several rooms or on multiple floors
- You find droppings, gnawing, shed wings, mud tubes, or damaged wood
- Sounds or odors suggest activity in a wall, attic, or crawl space
- Moisture problems and pest sightings occur in the same area
- A household member has unexplained bites and physical evidence needs review
- You are preparing for treatment and need an accurate scope
- You are buying, selling, or maintaining a home with a pest-related concern
- Remodeling exposes old damage or concealed nesting material
- Seasonal activity repeatedly appears around the same doors, windows, or roofline
Routine checks can also make sense in regions with year-round pest pressure, in homes with crawl spaces or heavy vegetation, and where termites or rodents are common. The right frequency depends on the structure, history, local pest pressure, warranty terms, and conditions found during earlier visits. A technician who knows the property can recommend a schedule based on risk rather than a one-size-fits-all calendar.

Questions to Ask Before the Technician Leaves
A short conversation at the end can prevent confusion later. Consider asking:
- What evidence confirms the identification?
- Do the signs appear current, old, or inconclusive?
- Where is the likely source or entry route?
- Which conditions should I correct first?
- What can I safely handle myself?
- Does any recommendation require another qualified trade?
- What treatment options fit this location, and why?
- What should I expect to see after treatment?
- How will we measure whether the plan worked?
- When should the area be reinspected?
The best answer is not always the fastest-sounding answer. Pest control works more reliably when the plan matches the species, evidence, building, and household instead of treating every sighting the same way.
A Better Inspection Leads to a Better Decision
A pest inspection turns isolated clues into a property-wide explanation. It can reveal whether a sighting is incidental, whether an infestation is active, which access points matter, and which moisture, food, or shelter conditions are helping the problem persist. Just as importantly, it can show when monitoring or maintenance is more appropriate than immediate treatment.
Homeowners get the most value by preserving evidence, sharing a clear timeline, allowing access to relevant areas, and asking how each recommendation connects to a finding. When inspection comes first, pest management becomes more targeted, easier to evaluate, and better suited to the home. That is the difference between reacting to the insect you saw and addressing the reason it was there.
Meta description: Learn what a pest inspection covers, how to prepare, which warning signs matter, and how inspection findings guide safer, targeted pest solutions at home.